How to Can Tomatoes: The Canning Process

Looking for a way to preserve the abundance of tomatoes from your garden or local farmer’s market? Canning tomatoes is a great way to enjoy them all year round. The process of canning tomatoes involves packing them into jars and processing them in a boiling water bath or pressure canner to prevent spoilage.
Tomato Canning Supplies
Before you start, it’s important to have clean and sterilized canning supplies. You’ll need:
- Jars
- Lids
- Bands
- Canning pot or pressure canner


It’s also important to choose high-quality tomatoes that are ripe but not overripe. You can use any variety of tomato, but some popular choices include Roma, San Marzano, and heirloom tomatoes. With a little bit of preparation and patience, you can enjoy the taste of fresh tomatoes in your favorite recipes all year long.
Preparing Tomatoes
Before you can start canning tomatoes, you need to properly prepare them. Here’s how to do it:
Blanching Tomatoes
Blanching tomatoes is the process of briefly boiling them in water to remove their skins. Here’s how to blanch tomatoes:
- Bring a pot of water to a boil.
- Cut a small “X” on the bottom of each tomato.
- Carefully place the tomatoes in the boiling water for about 30 seconds.
- Use a slotted spoon to remove the tomatoes from the boiling water and immediately plunge them into a bowl of ice water.
- Once the tomatoes have cooled, use a knife to peel off their skins.
Blanching tomatoes is especially important if you want to can whole or halved tomatoes. It ensures that the skins won’t be tough or chewy when you open the jars later on.
Make sure to wash your tomatoes thoroughly before blanching them. If you’re canning whole or halved tomatoes, remove the stems and cores before blanching.
Blanching tomatoes is a simple process that’s well worth the effort. It ensures that your canned tomatoes will have a smooth, uniform texture and will taste just as fresh as the day you canned them.
Methods for Canning Tomatoes
There are two methods for canning tomatoes: water bath canning and pressure canning.
Water Bath Canning
Ingredients:
- Tomatoes
- 1 Tbsp. Lemon Juice or ¼ tsp. Citric Acid (per pint)
- Canning Salt
- Boiling Water
Water bath canning is a safe and easy way to preserve high-acid foods like tomatoes. To begin, start by sterilizing your canning jars, lids, and rims. You can do this by boiling them in a water bath canner for 10 minutes. Once your jars are sterilized, fill each jar with your tomatoes, leaving about 1/2 inch of headspace. These tomatoes can be cut however you want them – diced, chunks, or halves.
Next, add either 1 tablespoon of bottled lemon juice or 1/4 teaspoon of citric acid to each pint jar, or 2 tablespoons of bottled lemon juice or 1/2 teaspoon of citric acid to each quart jar. This is important for acidification and helps to prevent the growth of harmful bacteria. Finally, add in some canning salt to taste, and top off each jar with boiling water, leaving 1/2 inch of headspace.
After filling the jars, remove any air bubbles with a non-metallic utensil, wipe the rims clean, and add the lids and rims. Process the jars in a boiling water bath canner for 35 minutes for pints and 45 minutes for quarts.
Pressure Canning
Ingredients:
- Tomatoes
- 1 Tbsp. Lemon Juice or ¼ tsp. Citric Acid (per pint)
- Canning Salt
- Boiling Water
If you’re looking to can foods like tomato sauce or whole tomatoes, you’ll need to use a pressure canner. Start by sterilizing your canning jars, lids, and rims as you would for water bath canning.
Fill each jar with peeled tomatoes, leaving about 1/2 inch of headspace. Add either 1 tablespoon of bottled lemon juice or 1/4 teaspoon of citric acid to each pint jar, or 2 tablespoons of bottled lemon juice or 1/2 teaspoon of citric acid to each quart jar. Add in some canning salt to taste, and top off each jar with boiling water, leaving 1/2 inch of headspace.
After filling the jars, remove any air bubbles with a non-metallic utensil, wipe the rims clean, and add the lids and rims. Process the jars in a pressure canner at 11 pounds of pressure for 25 minutes for pints and 30 minutes for quarts.
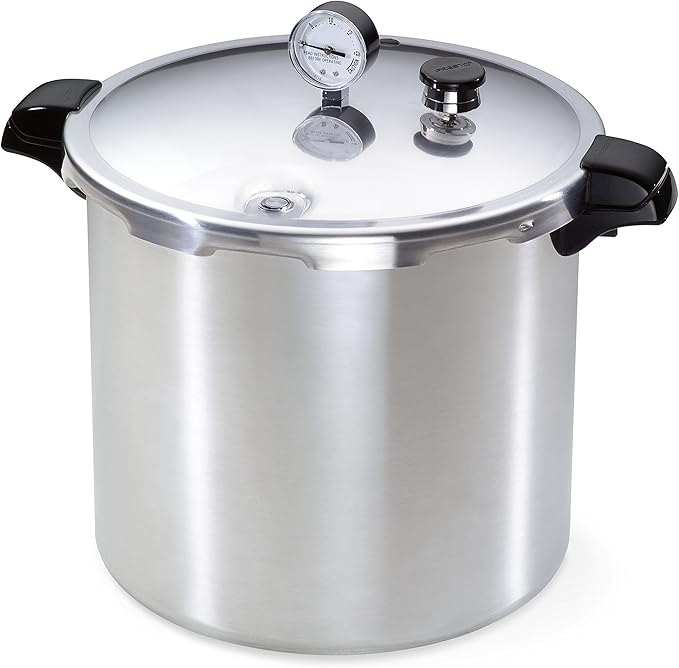
Using A Pressure Canner
A pressure canner is a specialized kitchen appliance designed for safe and effective home food preservation through the process of pressure canning. Unlike a regular water bath canner, which is used for high-acid foods like fruits and pickles, a pressure canner is essential for preserving lower-acid foods like vegetables, meats, poultry, and fish. These foods must be processed at higher temperatures to destroy harmful bacteria, which can thrive in low-acid environments.
Using a pressure canner involves creating a sealed and pressurized environment inside the canner. This increases the internal temperature beyond the boiling point of water, which is necessary for safe canning of low-acid foods. The process effectively kills bacteria, yeast, and molds that can lead to spoilage and foodborne illnesses.
Acidification in Canning
Acidification is an important step in canning tomatoes. It helps to prevent the growth of harmful bacteria like Clostridium botulinum, which can cause botulism. To acidify your tomatoes, you can use bottled lemon juice or citric acid. Follow the recommended amounts for each jar size, as listed above.
You can also use vinegar instead of lemon juice or citric acid, but it may affect the taste of your tomatoes. If you choose to use vinegar, use 5% acidity vinegar and add 2 tablespoons per quart or 1 tablespoon per pint.
Remember to always follow proper canning procedures and processing times. For more information on canning and food preservation, check out the National Center for Home Food Preservation.
Tips for Home Canning Tomatoes
When it comes to home canning tomatoes, there are a few tips and tricks that can help ensure that your canned tomatoes are safe to eat and taste delicious. Here are some important things to keep in mind:
Sterilize Everything
Before you start canning your tomatoes, it’s important to make sure that all of your equipment is clean and sterilized. This includes your jars, lids, and any utensils you’ll be using. You can sterilize your jars by boiling them in water for 10 minutes, and you can sterilize your lids by simmering them in water for 5 minutes.
Double-Check Everything
Make sure that all of your jars are free of cracks or chips, and that your lids are in good condition.
Head Space
It is important to leave the correct amount of headspace when canning tomatoes. This is typically 1/2 inch for both pints and quarts. Leaving too little headspace can cause the jars to break during processing, while leaving too much can lead to spoilage or an unsafe seal.
Air Bubbles
After filling your jars with tomatoes and liquid, use a plastic or wooden utensil to remove any air bubbles from the jar. This will help ensure that your tomatoes are evenly distributed and that there are no air pockets that could lead to spoilage.
Processing
Make sure to process your jars for the correct amount of time and at the correct pressure or temperature, depending on your canning method. Refer to trusted sources for processing times and guidelines.
Sealing
After processing your jars, make sure to let them cool completely before checking the seal. You can press down on the center of the lid. If the lid stays down, your jar is properly sealed. If it pops back up, your jar did not seal properly and should be refrigerated and used within a few days.
Remember to always follow food safety guidelines when canning tomatoes. By taking the time to sterilize your equipment, double-check your measurements, and process your jars correctly, you can safely enjoy delicious canned tomatoes all year round.